How to Propagate Snake Plant: Division, Leaf Cuttings and Water
Snake plants propagate three ways: dividing the rhizome, separating pups, or rooting leaf cuttings in water or soil. Division gives you finished plants immediately and keeps variegation. Leaf cuttings are easier but produce plain green plants and take six months or more to become a real plant.
That last point decides everything, and it should be the first thing you know rather than a footnote. If you own a Laurentii with yellow edges, a Moonshine, or any variegated cultivar, leaf cuttings will not reproduce what you have. The new plant comes back plain green. There is no technique that changes this.
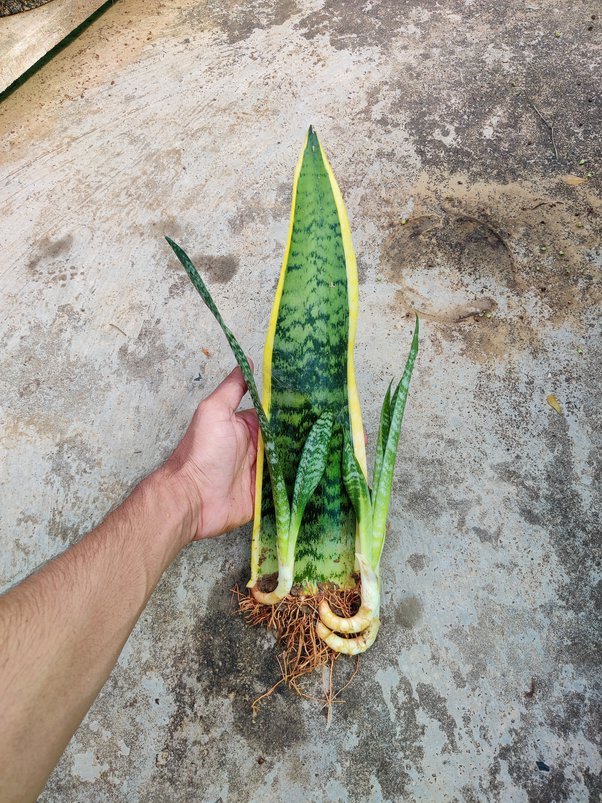
So the useful order is to choose the method before you pick up the scissors. This guide starts with that decision, covers all four methods properly, explains why variegation is lost, gives an honest verdict on the V cut everyone recommends, and sets realistic expectations on how long this actually takes.
Choose the method before you cut
| Your situation | Use this method | Why |
|---|---|---|
| Variegated plant, want to keep the pattern | Division or pups | The only methods that preserve variegation |
| Plain green plant, want many new plants | Leaf cuttings | One leaf yields three to five cuttings |
| Large crowded plant, want finished plants now | Division | Instant rooted plants, no waiting |
| Small plant, only one or two leaves | Leaf cuttings in water | Division needs a mature clump |
| Plant is dying, want to save something | Leaf cuttings from any firm leaf | Works even when the rhizome has rotted |
| Want to watch the process | Water cuttings | Roots are visible, rot is caught early |
| Want the strongest end result | Division, then soil cuttings | No transition step needed |
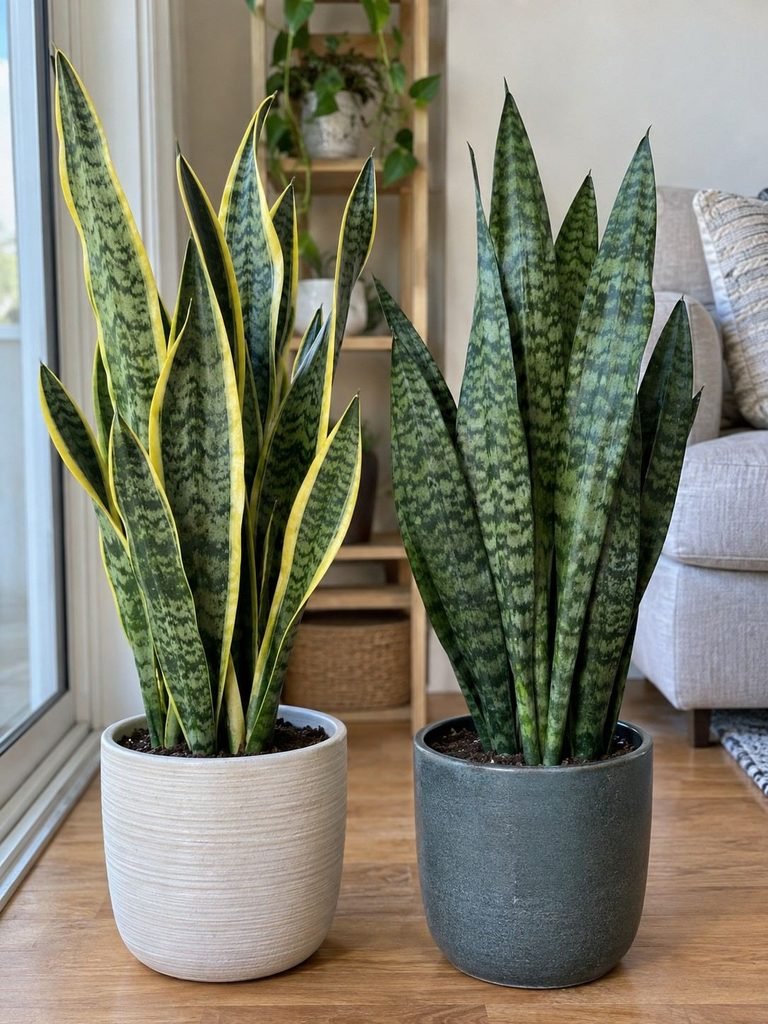
Two practical notes before you start.
Timing. Spring and early summer are best. Cuttings taken during active growth root roughly twice as fast, and winter cuttings often sit for months or rot before anything happens. If you must propagate in winter, expect very slow progress and keep the cuttings warm and bright.
Sterilise your blade. Wipe scissors or a knife with rubbing alcohol. Snake plant cuttings are slow, which gives bacteria plenty of time to take hold in a crushed or contaminated cut.
Why variegated snake plants lose their pattern
This is the single most important thing in this article and most guides give it one sentence.
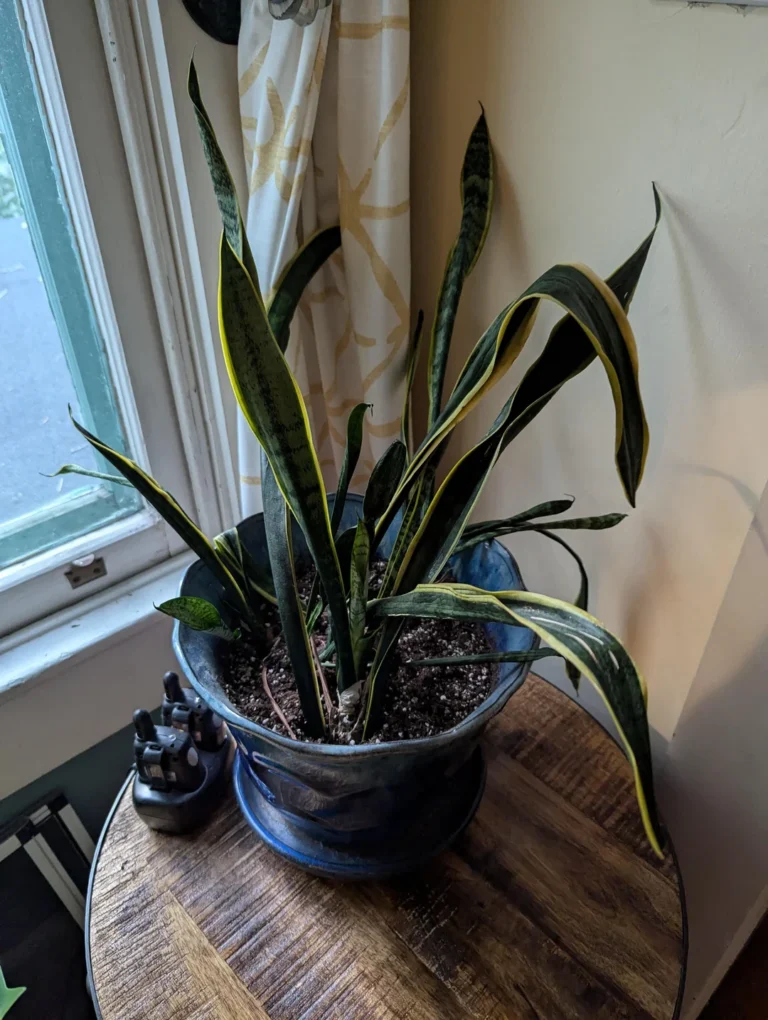
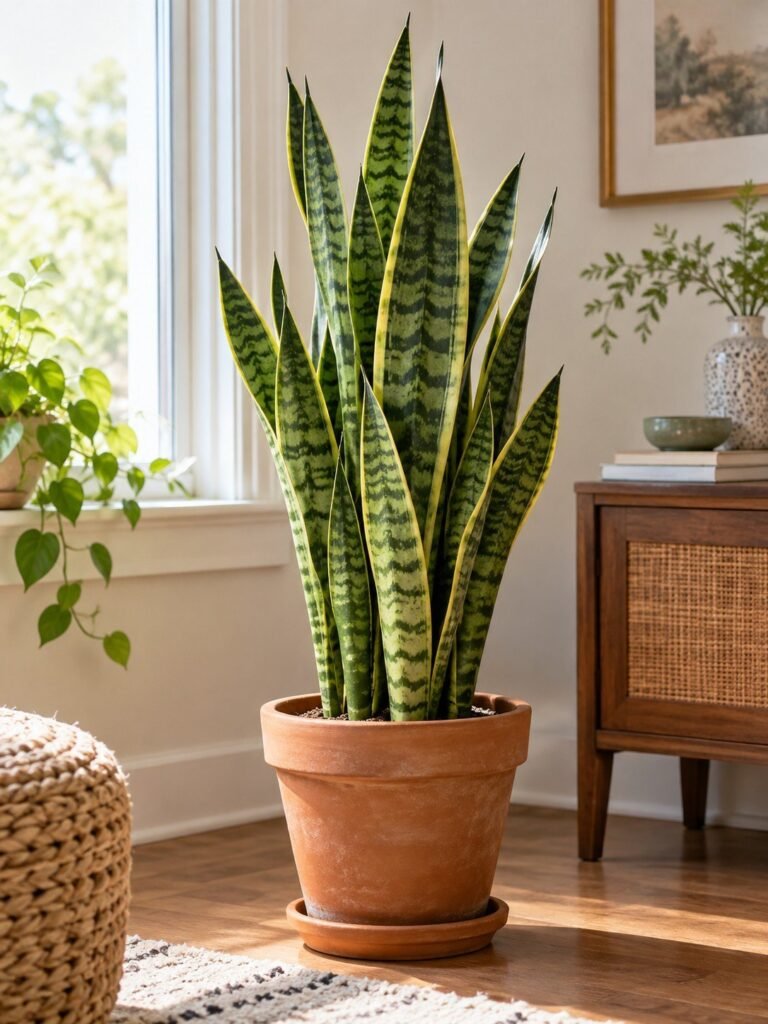
A variegated snake plant like Laurentii is what botanists call a periclinal chimera. The plant is built from two genetically different tissues growing together as one. The green and silver banded interior comes from one cell line. The yellow edge stripe comes from a separate cell line sitting in the outer layer.
When you root a leaf cutting, the new plant regenerates from cells at the cut base. Those cells come from the interior tissue only. The outer layer that carries the yellow does not regenerate, so the plant that grows is genetically the green form. It is not a failure of your technique and it is not fixable by cutting differently, using rooting hormone, or giving it more light.
Division works because you are not regenerating anything. You are separating an existing plant that already contains both tissue layers, growing as it always has.
The rule: if the leaf has yellow edges or pale silvery colouring you want to keep, divide. If it is plain green, cut freely.
If you are unsure which variety you have, our snake plant care guide includes a table of the common types and their markings.
1. Division
The fastest method and the only reliable one for variegated plants. It works on any mature snake plant with several leaf clusters emerging separately from the soil.
Prepare the plant. Water lightly two days before. Slightly moist soil keeps roots flexible and lets the root ball come apart rather than snapping. Do not do this on a soaking wet plant or a bone dry one.
RELATED: 20 Planter Box Ideas for Stylish Outdoor and Indoor Spaces
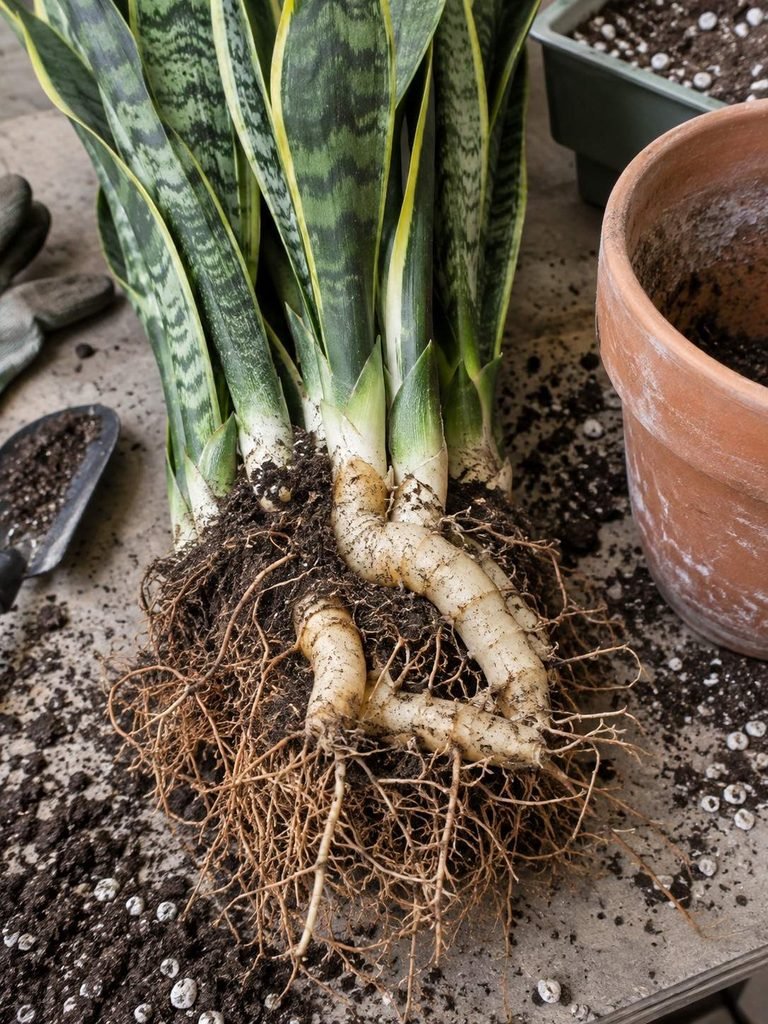
- Lay the pot on its side and slide the plant out. Squeeze a plastic pot or run a knife around the inside of a rigid one. Never pull by the leaves.
- Brush the soil away from the roots with your fingers until you can see the rhizomes, the thick pale horizontal stems the leaves grow from.
- Find the natural divisions. Look for points where clusters of leaves have their own roots attached. Well established plants often pull apart by hand with gentle pressure.
- Cut only where you must. Where rhizomes are genuinely fused, cut through with a sterilised knife. Each division needs at least three rhizome segments, a leaf cluster, and its own roots.
- Let cut surfaces dry for a few hours before potting, or overnight if you cut through thick rhizome.
- Pot each division in fresh gritty mix, one to two inches wider than its roots.
- Wait five to seven days before watering. This is the step people skip. Freshly cut rhizomes in wet soil rot readily. Let the wounds seal first.
What to expect: these are established plants from day one, so there is no rooting period. Some leaf droop for a week or two is normal transplant response. New growth typically appears within two to three months.
2. Separating pups
The easiest version of division, and the one to use when the parent plant is healthy and you do not want to disturb it much.
Pups are small offsets that appear beside the parent, pushed up from the spreading rhizome. They are already connected to the root system and often have roots of their own.
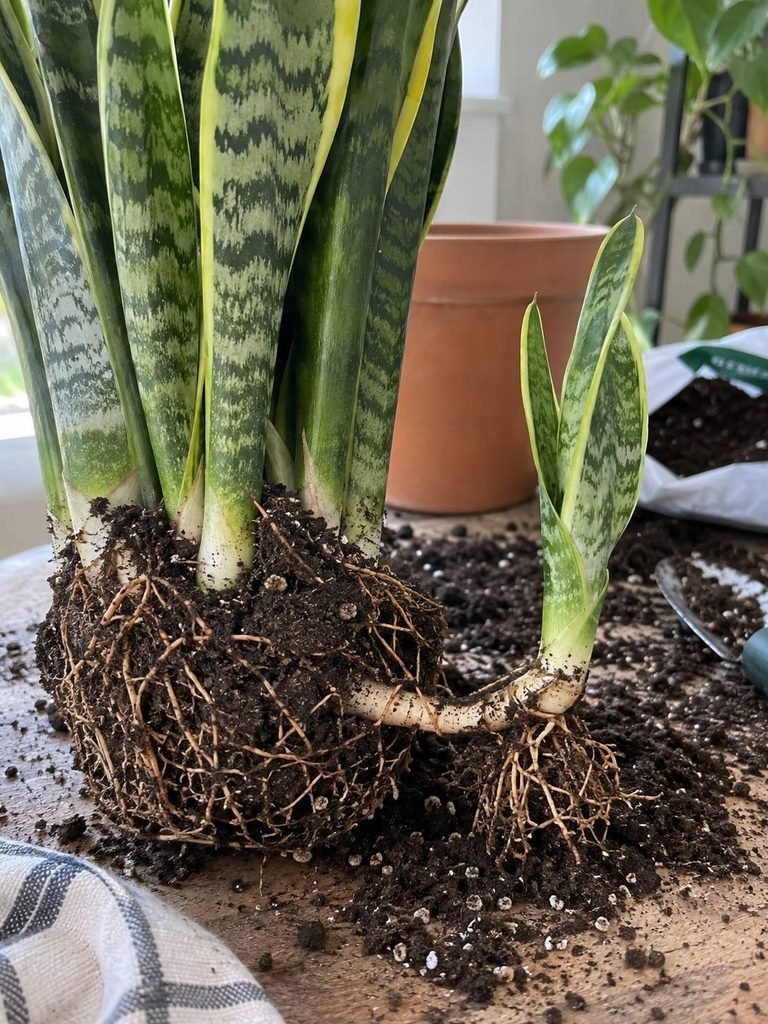
Wait until a pup is at least three to four inches tall and has been growing for a while. Slide the parent out of the pot, locate where the pup’s rhizome joins the parent, and cut it free with a sterilised knife, keeping whatever roots are attached to the pup. Let the cut dry a few hours, pot it in gritty mix, and wait a week before the first watering.
Pups preserve variegation exactly like division does, because you are separating existing tissue rather than regenerating it.
RELATED: 14 Giant Indoor Plants That Never Die: Your Complete Guide
3. Leaf cuttings in water
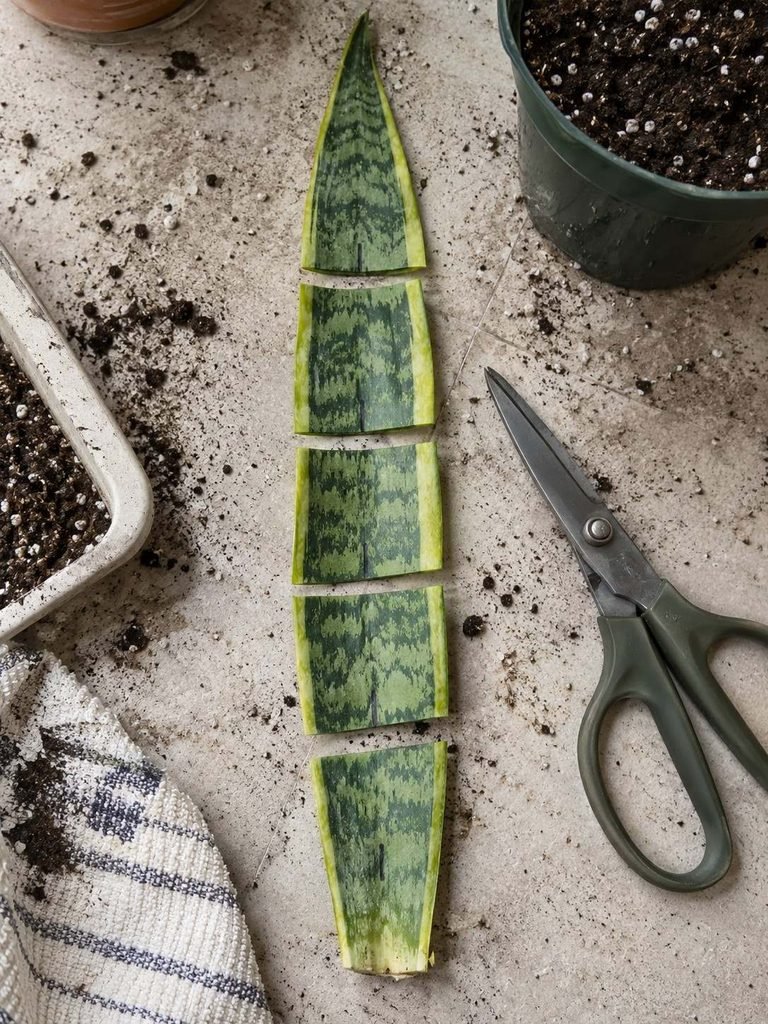
The most popular method, the easiest to start, and the slowest to finish. Only worth doing on plain green varieties.
- Cut a healthy leaf at the base with sterilised scissors. Choose a firm, well coloured leaf, not the oldest or the most damaged.
- Cut it into sections of three to four inches. One long leaf gives three to five cuttings.
- Mark which end was down. This matters more than anything else in the process and is covered below.
- Let the cut ends callus for one to two days in open air until the surface goes dry and slightly whitish. Skipping this is the main reason cuttings rot.
- Stand the cuttings in a jar with about an inch of water covering the bottom end only. Do not submerge more than a quarter of the cutting.
- Bright indirect light, away from direct sun which heats the water.
- Change the water every five to seven days. Fresh water carries oxygen and prevents bacteria building up.
- Wait three to six weeks for roots.
Which way up: the mistake that wastes months
A snake plant leaf section only roots from the end that was originally closest to the soil. Put it in upside down and it will sit there for months, produce nothing, and eventually rot. There is no visual clue once the leaf is cut, and this is genuinely the most common propagation failure.
Mark the leaf before you cut it. Lay the whole leaf flat, then either cut a small notch in the top edge of each section as you go, or draw a line with a marker pen down the leaf before cutting. Either way you can tell orientation at a glance afterwards.
If you have already cut without marking and cannot tell, put the sections in water anyway. The end that roots will reveal itself in a few weeks, and you will have lost nothing but time on the ones that were reversed.
Is the V cut actually necessary?
Almost every guide tells you to cut the bottom of each section into an upside down V or a diagonal, and most present it as essential. One popular guide admits openly that it works but that the author does not know why.
Here is the honest position. There are two plausible mechanisms and neither is dramatic. A pointed base does not sit flat against the bottom of the jar, so water circulates around the cut surface instead of stagnating against glass. And an angled cut exposes slightly more surface area for root initiation.
Both effects are real but modest. A straight cut works. Plenty of people root snake plants with flat cuts and never have a problem.
The V cut has a second, more useful function that nobody mentions: it makes orientation obvious. A pointed end is unmistakably the bottom, which solves the upside down problem without needing a marker.
Use it if you like. It will not hurt. Just do not believe that a flat cut is why your propagation failed, because it almost certainly is not.
4. Leaf cuttings in soil
Slower to show progress but produces stronger roots, because they form in the medium they will live in and never need to transition.
Cut and section the leaf exactly as above, mark orientation, and let the ends callus for two to three days, slightly longer than for water. Push each section about an inch into pre moistened gritty mix, deep enough to stand upright. Firm the medium lightly around it.
Keep the mix barely moist, never wet, in bright indirect light. Test after four to six weeks with a very gentle tug. Resistance means roots have formed.
Some people dip the cut end in rooting hormone first. It makes a modest difference in soil, more than it does in water, and it is optional.
5. Rhizome cuttings
A lesser known option that sits between division and leaf cuttings.
When you unpot a mature plant you will sometimes find sections of rhizome with no leaves attached, or you can deliberately cut a rhizome segment away from the parent. Each piece with a growth point on it can produce a new plant, and because it is existing tissue rather than regenerated tissue, variegation is preserved.
Cut a firm pale rhizome section, let it callus for one to two days, and plant it just below the surface of gritty mix. Keep barely moist. New leaf spears usually emerge within two to three months.
Moving water cuttings into soil
Roots grown in water are thinner and more delicate than soil roots, and they lack some of the fine structures soil roots use to draw moisture from particles. Moving a cutting badly is a common late failure.
Transfer when roots are one to two inches long. Shorter and there is not enough root to sustain the cutting. Much longer and the roots have fully committed to water, making the switch harder.
Use gritty mix rather than dense soil, make a hole first rather than pushing the cutting in, and backfill loosely. Keep the mix slightly more moist than you would for an established snake plant for the first two to three weeks, then taper to normal. No fertiliser for the first month.
If you would rather avoid the risk, add a spoonful of soil to the propagation jar each week for three or four weeks so the roots meet soil gradually while still in water. Slower, but the success rate is very high. The same approach works for other water propagated houseplants, and our guide to propagating pothos covers it in more detail.
Roots are not the finish line
This is the part that catches almost everyone, and no guide in the search results warns about it clearly.
When roots appear on a leaf cutting after three to six weeks, it feels like the job is done. It is not. Those roots support the leaf section, but the leaf section is not a plant. A snake plant grows from a rhizome, and the cutting has to generate a new rhizome before it can push up a new leaf.
That second stage takes another two to six months. Sometimes longer.
So a realistic timeline for leaf propagation looks like this:
Weeks 3 to 6. Roots appear. The cutting is alive and stable. Months 2 to 4. Nothing visible happens. The cutting sits there looking exactly the same. This is normal and it is not a failure. Months 3 to 8. A small pup pushes up beside the original cutting. This is the actual new plant. Months 8 to 18. The pup reaches a recognisable size.
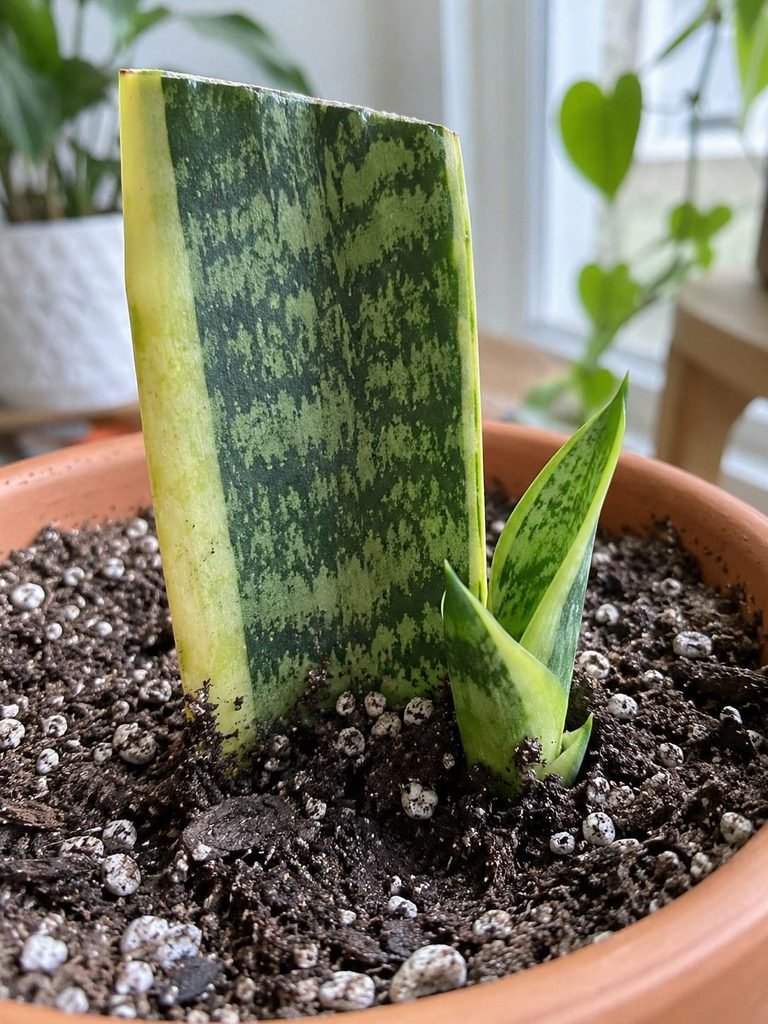
The original leaf section stays in place the whole time, feeding the pup. Leave it. It will eventually yellow and can be removed then.
If you want a real snake plant in under three months, divide. If you are content to wait most of a year, leaf cuttings will get you there and give you more plants for the effort.
Why cuttings fail
The bottom goes soft, brown and mushy. Rot. Usually caused by skipping the callusing step, stale water, or too much of the cutting submerged. Cut back into firm tissue, re callus for two days, and start again with fresh water changed more often.
No roots after eight weeks. Most likely upside down. Also possible in cold rooms or dim light, both of which stall snake plant cuttings badly. Try flipping the cutting.
Roots formed but the cutting later declined after potting. Transition failure. Roots were probably too long, the mix too dense, or it dried out in the first fortnight.
Roots formed but no pup after a year. Slow but not necessarily failed. Check the cutting is still firm. Warmth and bright light both speed the second stage considerably. A cutting in a dim cool room can stall almost indefinitely.
The new plant came back plain green. Not a failure. This is the chimera issue and it was always going to happen with a leaf cutting from a variegated plant.
The whole cutting shrivelled and went papery. Too dry, usually a soil cutting that was left unwatered, or a water cutting where the water evaporated below the cut end.
If the parent plant is also struggling, our guide to snake plant leaves curling covers diagnosing what is going wrong before you take more cuttings from it.
How many plants can you get?
Realistic expectations, because the promise of endless free plants is oversold.
A single healthy leaf gives three to five sections. Perhaps three or four of those will root successfully. Of those, most will eventually produce one pup each, occasionally two.
RELATED: 35 Indoor Plants That Instantly Refresh Your Home
So one leaf yields roughly three new plants, over the course of about a year.
A mature crowded plant divided cleanly gives two to four finished plants in an afternoon.
That comparison is the whole argument for division. If you have a plant big enough to divide, do that. Save leaf cuttings for when you only have a small plant, when you want many plants and do not mind waiting, or when you are rescuing something that is dying.
What happens to the parent plant
Overlooked in every guide, and worth thirty seconds of thought before you cut.
After taking leaf cuttings. The leaf you cut will not regrow. Snake plant leaves grow from the rhizome and do not branch or regenerate from a cut edge, so where you removed a leaf there will simply be a gap. Cut at soil level rather than partway up, because a stub left standing looks worse than a clean removal and will slowly yellow anyway. Take no more than a third of the leaves at once, and choose from the outer edge of the clump so the gap is less obvious.
After division. The parent no longer exists as such, since you have turned one plant into several. Each division will look sparse for a few months. Expect no new growth until the roots have re established, which is typically two to three months, longer if you divided in autumn.
Watering after either. This is where people lose plants they have just successfully propagated. A plant that has lost a third of its leaves, or a division that has lost most of its root system, needs considerably less water than before. Less foliage and fewer roots means slower uptake, so the same watering routine that suited the full plant now leaves the soil wet for far too long. Stretch the interval and check the soil three inches down before every watering for the first couple of months.
Feeding. None for at least six weeks after either operation. Cut roots and cut rhizomes cannot take up fertiliser, and the salts add stress at exactly the wrong moment.
Faqs
Why did my variegated snake plant come back green?
Because leaf cuttings regenerate from interior tissue only, and the yellow edge is a separate genetic layer that does not regenerate. Divide the plant instead to keep the variegation.
How long does it take to propagate a snake plant?
Roots in three to six weeks from a leaf cutting, but a new pup takes another two to six months. Division gives you finished plants immediately.
Can you propagate a snake plant from a broken leaf?
Yes. Trim the broken end back to firm tissue, let it callus for a day or two, and root it in water or soil like any other cutting.
Does the leaf cutting need to be a certain way up?
Yes. Only the end that was closest to the soil will root. Mark the leaf before cutting, because there is no way to tell afterwards.
Can I propagate a snake plant in winter?
You can, but expect it to take two or three times as long, with a higher chance of rot. Spring and early summer give much better results.
Do I need to cut the leaf into a V shape?
No. A straight cut works. The V helps water circulate slightly and marks which end is the bottom, which is genuinely useful, but it is not the reason cuttings succeed or fail.
Is it better to propagate snake plant in water or soil?
Water is easier to start and lets you watch progress. Soil produces stronger roots with no transition step. For a variegated plant, neither one preserves the pattern, so use division.